BAKED MAC & CHEESE (NON-DAIRY)
A few years ago, I had my first episode of vertigo while on a personal trip out to Kansas for my friend Lee’s wedding. Thankfully, I have not had an episode since then, but one of the things I discovered that seemed to be a contributing factor was my consumption of cow’s milk. After cutting that out of my diet (with the exception of butter), I felt noticeably better, gaining more energy during the day and also lost a bunch of weight as well.
On the flip side, that completely took my mac & cheese dish out of the equation for me. I went two years without having mac & cheese before I decided to start investigating if there were any non-dairy recipes instead. I tried one that had me combining turmeric, sautéed onions, almond milk, and nutritional yeast in a blender to create the “sauce,” and let’s just say that yielded some less than stellar results.
After a bit of a break from that attempt, I then turned my attention to seeing if I could adapt my existing recipe, but switching out some ingredients. I will say that with non-dairy alternatives becoming more mainstream in the local grocery stores, it made the effort a lot easier. I was definitely thrilled with how the end result turned out.

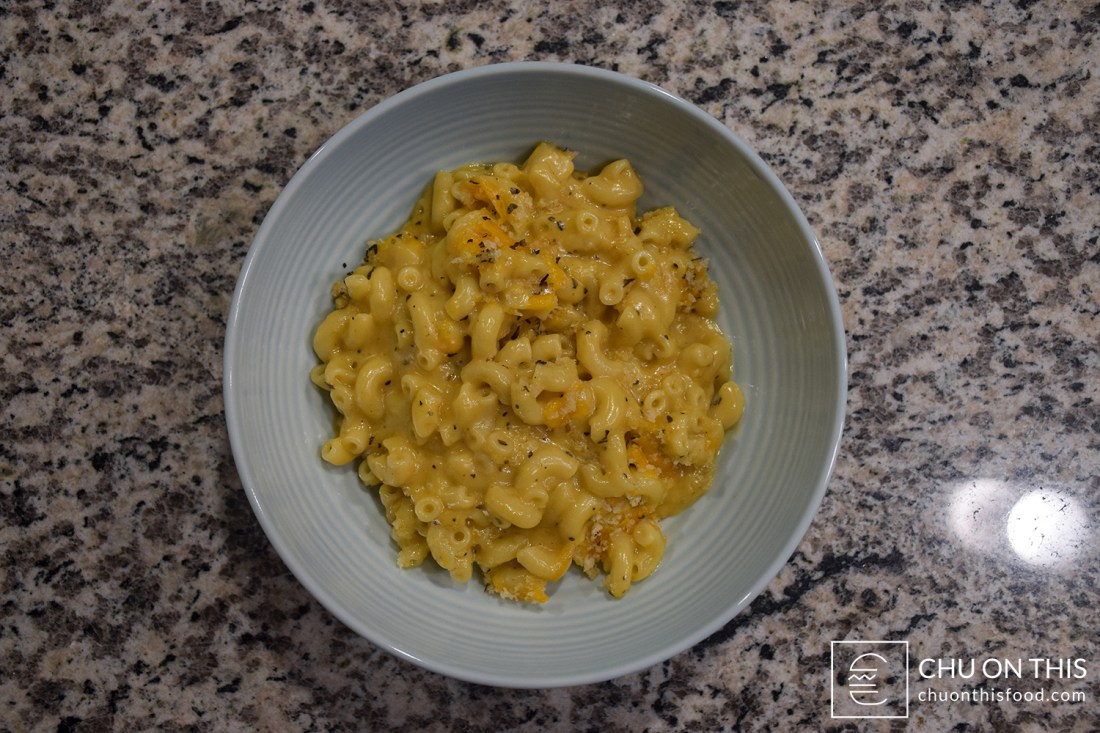
With a cheese sauce that is smooth and creamy, this non-dairy mac & cheese certainly captures the feel of the conventional dish. It’s also highly customizable, where you can add in other sauces or toppings to suit your own tastes.
~><~
Baked Mac & Cheese (Non-Dairy)
Makes 6 – 8 servings
1/2 – 2/3 of 16 oz. box of macaroni
1/4 cup vegan butter
1/4 cup all-purpose flour
1/2 tsp dried basil
1/8 tsp cayenne pepper
3 cups cashew milk
1/4 tsp nutmeg
1 tsp salt
1/2 tsp black pepper
1/2 tsp garlic powder
3 cups vegan cheese
Topping:
1/2 cup panko breadcrumbs
1 tbsp vegan butter
1/2 cup vegan cheese
Here are the following non-dairy alternative products that I tried and worked well with the recipe:
- Butter: Miyoko’s Creamery
- Cashew Milk: Elmhurst
- Cheese:
- Cheddar: Violife, Follow Your Heart, Miyoko’s Creamery
- Pepper Jack: Miyoko’s Creamery
Prep Work:
- Cut up your butter into smaller pats in order to help it during the melting process.
- Measure out and divide up your dry ingredients into containers to help make cooking on the stovetop smoother. Wet ingredients I would add in directly during the cooking process.
Cooking:
- Take a large pot that you’ll be using to cook the macaroni and fill it with water. Add in a bit of salt and then set it aside on the stove without turning on the heat. You can potentially time it just right so that your macaroni and sauce finish cooking around the same timeframe.
- Melt your butter in a large saucepan over medium heat. When the butter starts to foam up, stir in your flour with a whisk.
- Keep the saucepan at medium heat and cook out the starch from the flour, which takes about 2 minutes. If you’re using white flour, the color should be more of a pale yellow. If you’re using whole wheat flour (darker brown), then the color should be a lighter brown.
- Once the flour is done cooking, add in your basil and cayenne pepper and combine. Let it cook on medium heat for another 30 seconds, and then whisk in 1 cup of cashew milk. Get everything to be nice and combined before adding in the rest of the milk. After you’ve done that, go ahead and start to preheat your oven to 400 degrees.
- Here is where you’ll need to take out a rubber spatula or wooden spoon to use, since you’ll need to know if the milk is thickening up. Add in your nutmeg, salt, pepper, and garlic powder and stir.
- At this point, turn on the heat to your pot of water to get it boiling for the macaroni. Keep an eye on it and pour in the macaroni to cook when ready.
- Bring your saucepan’s heat up to high, as this is the key part of making the sauce. Remember the smooth feeling of running your spoon through the cashew milk now, as you’ll need to compare that to how the milk feels in a few minutes to see if it has thickened at all.
- Continuously stir the milk the entire time it is on high, being sure to scrape the inside corner of the saucepan to pick up any residuals that might have settled. I think it might take approximately 3 – 5 minutes for the milk to thicken a bit, but I did it mostly on a “feel” basis.
- Once the milk has thickened up, lower the heat down to medium and then begin to add in your cheese a few handfuls at a time. Stir in everything so that it blends well together; the sauce will continue to thicken with the addition of the cheese, but the consistency should be relatively smooth and not clumpy.
- When it looks like the cheese shreds have melted down, this is now essentially the finished sauce. Go ahead and taste it to see if you need to make any flavor adjustments to it.

- Drain out the macaroni when that is done cooking and set that aside. Take out a 9″ x 13″ casserole dish and let’s begin to start assembling things together. Transfer your macaroni into the casserole dish and then pour your cheese sauce over it, distributing it around the pan evenly and stirring it up so that all the pasta is coated. Don’t worry if it seems like there is too much sauce compared to the pasta, as some of it will evaporate when it bakes in the oven.
- The last component to make for the dish is the breadcrumb topping that will be sprinkled over everything. Put your panko breadcrumbs into a small bowl, pushing the breadcrumbs out from the middle to make a small depression in the pile. Melt down the tablespoon of butter and pour it right into the depression. Mix that all around with a fork until it looks like all the panko breadcrumbs have been coated.
- With the remaining 1/2 cup of shredded cheddar, sprinkle that over the top of the macaroni / cheese sauce mixture before sprinkling the breadcrumb topping over that. Cook that in the oven uncovered for 20 minutes, or until the breadcrumbs and cheddar cheese topping are golden brown.
Serving:
- Bowl or dish, either one works well for the mac & cheese. This is also your opportunity to add some customization with sauces and toppings as well, if you’re looking to change things up from the plain ol’ mac & cheese.
- Some items that have worked well for me, to give you some ideas:
- Sun-dried tomatoes
- Chipotle Tabasco sauce
- Buffalo sauce
- Sriracha sauce
- Chicken tenders
- Bacon

Because I knew I wouldn’t be able to replicate that distinct cheddar cheese flavor 100%, the thing I was targeting with this rendition was the consistency of mac & cheese. I have to say, the dish turned out really well in that aspect. The cheese sauce was smooth and rich, just like the conventional dish would have been. The way I’ve also described the sauce has been to let it be the “flavor vehicle” for something else, to help complement things. I’ve had great success with adding both Buffalo sauce or Chipotle Tabasco sauce for added depth of flavor as well.
I’m stoked that I’m able to enjoy mac & cheese again after a two-year hiatus. The first attempt that I had trying to follow another non-dairy mac & cheese recipe turned out pretty poor and left me a bit disheartened. But I’m really glad that I decided to take another shot and experimented with my own recipe to come up with this one. If you were in the same boat that I was, perhaps take another chance and give this version a try.
Categories: Recipes
